Some mouth watering inspiration!
This is Jennifer Schwartz, Julie and I are switching months! For February, we will be learning the Dresden Plate! Here is some
Dresden history of this versatile design.
Lately I'm a big fan of blue and yellow. Mostly because of this painting my mother-in-law did for me. My sister was just here from Idaho and helped me paint my kitchen this cheery yellow!
Now down to business. I have packages for each of you! They each include a 12 1/2" blue base, Dresden template...thanks Jennifer R and Emily S., Some destructions, (yes I know I spelled it wrong...that's what my parents always called them growing up.) and a few zero calorie goodies. (I keep trying to loose weight but it keeps finding me.)
First a Retractable Reel from Julie! My most favorite tool! Snap this puppy to one of the finger rings of your little scissors and hook it on your shirt and you always have your skissorz handy.
The other treat is a mini pin cushion I picked up at a craft fair and this sweet little old lady makes these using the "plug" from her coffee creamer container. (That stuff is AMAZING in hot chocolate too...but not so zero calorie.)
Your mission, is to use charms or regular fabric in soft yellows and whites and blue if you feel the need. The plate calls for 20 wedges total and you can repeat fabrics as much or little as you desire. Have fun!
OK, now for some online destructions. Use 4" strips or cut 1" off of a charm and you can get two wedges in each charm square. Now play around arranging your 20 darlings any way you choose.
NEXT...make SURE you are sewing a 1/4" seam!
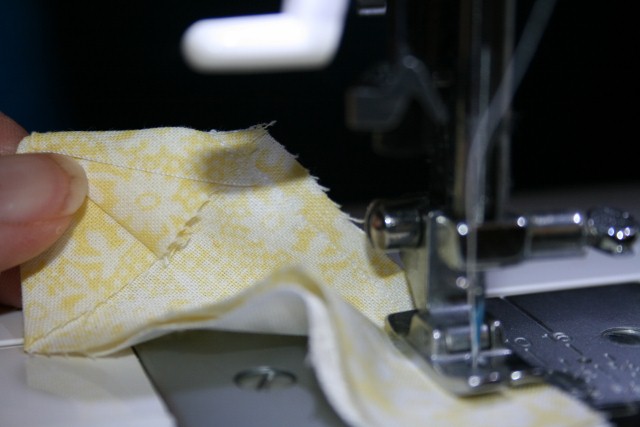
Start Chaining them threw. My DS helped me push these puppies through with the fancy screw driver. Make SURE to use a smaller stitch leingth 2 mm is GREAT...just don't make a mistake and have to unpick. Cut some extra wedges just in case.
They sell a special tool for this but a bamboo skewer or screw driver do just fine to help push these tiny pieces through.
Now nip the corners of the FOLDED corner, snip apart, and use this fancy shmancy turning device called a medicine syringe to help you make a nice point when you turn the self facings.
This is a young Dresden Jedi in training. He is using "the force."
Finger pressed and ready to go to the big bad IRON
Make sure to use DRY heat, NO STEAM or your pieces might stretch and warp and end up aligned with the "dark side."
Now pair them up right sides together. The destructions say to start 1/4' down (blue dot), back stitch up to the top and continue with the seam to the bottom. This works great for the first one, however I am lazy and like to chain them all together. I sew down about 1/4", backstitch to the top and go forward again. If double reinforcement works Tripple is better right?
Jenn's famous tipple reinforcement.
ALWAYS have the light material down, so you can press the seam to "The Dark Side" dun, dun, dun. No really Julie taught me that. Some destructions say to press the seams open (One seam allowance going right, the other left.) You do what you think is best for you and your situation. I just think it looks better not having underwear lines showing.
The Dresdens go marching two by two....
Match up your pattern to sew foursies.
I thought it kind'a looked like a butterfly.
Now Make eightsies, twelvsies, and twentiesies.
Use the force to iron to the dark side.
Now for perfectly centered placement. Carefully fold your 12 1/2" piece in quarters and iron just in the middle...use this for lining up your Dresden plate perfectly in the center.
Look at you go! Now to decide what to use for the center and stitching it all on to make the finished block. You are more than welcome to hand stitch this on by I guarantee I will be using the machine and a blanket stitch or something. You do what works for you.
Just finished putting my 20 wedges together with the help of my 4 y/o!


.jpg)
.jpg)